Dear Lauren,
I handed your dad a cookbook last night and said, hey, take a look and see what looks good to you for the weekend. So he chose five recipes and marked them with those little 3m page stickers I like. Then he said, carne guisada sounds good.
Oh? Was that one of the recipes in the book?
No, I marked chicken fried steak, Iowa skinnies, biscuits and sausage gravy, Chicago-style Italian beef sandwiches and funeral potatoes. But carne guisada sounds good.
I decided to come up with a recipe for the Instant Pot. Why Not? It's summer and who wants to heat up the kitchen with a stew on the stove or a braise in the oven? Not me.
This recipe is adapted from one I found early on in my internet research. Reading over it, I knew the complexity of flavor would be there. I made a few changes, including to the cooking method. We loved it. Serve this over rice, in a tortilla, or simply as what it is, a stew - a spicy, Tex-Mex stew. You can garnish it with chopped onion, chopped cilantro, avocado, or anything else you like.
P.S. While I was cooking, my phone broke! I'm heartbroken! I have no photo for you. Dad has one photo on his phone of the very last bite. I'm not sure that's worthy of posting on this blog lol! I will be making this again soon, no doubt abut that, so I will update with a photo later.
1 teaspoon cumin
2 Tablespoons avocado oil, divided
1.5 pounds top sirloin, trimmed, cut in 1 inch pieces
1 small onion, sliced
1 jalapeno, seeded, diced
1 garlic clove, minced
1/4 teaspoon Mexican oregano
1 teaspoon sea salt
1 teaspoon freshly ground black pepper
1 teaspoon Hungarian paprika
1 Tablespoon chili powder
1 tomato, (seeded over a strainer and bowl, tomato juice reserved), peeled, diced
1 cup water
1/2 cup tomato sauce
reserved tomato juice
1 teaspoon beef Better than Bouillon, optional
2 Tablespoons avocado oil
2Tablespoons all purpose flour
Toast the cumin in a small skillet for 5 minutes on medium-low heat, stirring occasionally. Remove from the heat and place the cumin in a bowl or plate to cool completely.
Set the Instant Pot to Saute. Add 1 Tablespoon avocado oil. When the indicator shows Hot, add around 10 pieces of the beef and sear them, making sure not to crowd the pan or the beef will steam. Remove each batch of the beef to a plate when seared and add 10 or so more pieces until you've seared all of the beef.
Add the sliced onion and jalapeno with a little splash of the water if needed. Stir the onion and jalapeno into the bottom of the pan to deglaze the pan. Cook about 1 minute. Add the garlic, stir about 30 seconds. Add the remaining tablespoon avocado oil, stir, add all spices (cumin, oregano, salt, pepper, paprika, and chili powder) and stir. Add the diced tomato, water, tomato sauce, reserved tomato juice, and Better than Bouillon, if using. Stir well. Return the beef and any accumulated juices to the Instant Pot liner.
Place the lid on the Instant Pot and set on Sealing, Manual, 40 minutes. While the stew cooks, make the roux.
In a small skillet over medium-low hear, add the avocado oil to the pan. When the oil is very hot, add the flour a bit at a time and stir well and constantly with a small whisk. Continue to add the flour, continually whisking, until all the flour is incorporated and the roux is a golden color which will take about 2 minutes. You are not looking for a dark roux like when you make gumbo, this roux is simply to be used as a thickener for the stew. Remove from heat and set aside.
When the carne guisada has finished cooking, do a Quick Release, and reset the Instant Pot to Saute.* Once the stew comes to a simmer, stir in half the roux. Check the thickness of your gravy. Add more roux until you reach the desired thickness.** Stir and cook for 1-2 minutes.Turn off the Instant Pot. Serve.
*Quickly taste the beef to make sure it is very tender. If it isn't, you can place it back under pressure for 10 minutes. I don't believe that step will be necessary.
**I used about 1/2 to 2/3 of the roux.
Love,
Mom
Friday, June 15, 2018
Instant Pot Carne Guisada
37 Cooks members receive products from our sponsors to work with to create their posts; no other compensation is given. All content is solely the opinions of our members. Members also write non-sponsored posts that do not feature any products. These are not compensated in any way..
Friday, January 20, 2017
Cajun Seven Layer Dip

Cajun Seven Layer Dip
by Linda Mire
12 ounces peeled and cleaned, frozen crawfish tails, thawed
1 Tablespoon unsalted butter
1 cube Dorot garlic or 2 cloves of garlic, minced
Juice from 1/2 lemon
1/4 cup of
1 8-ounce brick Philadelphia cream cheese, softened
1 8-ounce container of mascarpone
1/2 link andouille sausage, chopped into bit size pieces
1 15.5-ounce can small red beans (I used Goya)
Lettuce, shredded (about 1/2 cup), just for a little green
Tomato, diced into bite-sized pieces
1 bunch of green onions, dice whites and part of the greens
1/2 pound pepper cheese (jalapeno or hatch), grated
Black olives
Layer 1
1. Melt butter in large saute pan, medium heat. Add thawed crawfish tails, garlic and lemon juice. Saute for 2-3 minutes until crawfish fully cooked.
2. Turn off heat and add the 1/4 cup of Jay D’s Molasses Mustard. Coat crawfish tails. Set aside.
3. Cream together cream cheese and mascarpone.
4. Strain crawfish tails, then fold into cream cheese/mascarpone mixture.
5. Spread mixture into small shallow serving dish.
Layer 2
1. Grab another saute pan and brown andouille sausage.
2. Drain and rinse can of small red beans. Add to andouille sausage and cook for 1 minutes.
3. Place sausage/bean mixture on top of cream cheese/mascarpone mixture.
Layer 3
Add layer of shredded lettuce.
Layer 4
Add layer of diced tomatoes.
Layer 5
Add layer of green onions
Layer 6
Add layer of shredded cheese
Layer 7
Last layer, black olives. I just scatter a few.
Garnish top with additional Jay D’s Molasses Mustard.
Chill for 1 to 2 hours.
Enjoy with your favorite cracker, corn chip or veggie!
37 Cooks members receive products from our sponsors to work with to create their posts; no other compensation is given. All content is solely the opinions of our members. Members also write non-sponsored posts that do not feature any products. These are not compensated in any way..
Thursday, January 19, 2017
Guava Pastries

My box contained some really great stuff from Brazil and as soon as I saw the guava paste, I knew I was gonna make guava/cream cheese turnovers. The recipe follows, and the turnovers were delicious!
Guava Pastries
by Matt the Butcher
1 package Guava paste
1 box frozen puff pastry dough
1 8 ounces package cream cheese
Preheat oven to 425°F.
Follow package directions for rolling out puff pastry, and cut each sheet into 4 squares. Cut cream cheese and guava paste into 8 pieces each. Lay one piece of cream cheese and guava on a square of dough and sprinkle with a little sugar. Fold and seal the dough and place pastries on a sheet of parchment paper on a sheet pan. Bake for 20-25 minutes till golden brown.
Follow package directions for rolling out puff pastry, and cut each sheet into 4 squares. Cut cream cheese and guava paste into 8 pieces each. Lay one piece of cream cheese and guava on a square of dough and sprinkle with a little sugar. Fold and seal the dough and place pastries on a sheet of parchment paper on a sheet pan. Bake for 20-25 minutes till golden brown.
37 Cooks members receive products from our sponsors to work with to create their posts; no other compensation is given. All content is solely the opinions of our members. Members also write non-sponsored posts that do not feature any products. These are not compensated in any way..
Wednesday, January 18, 2017
Mini Zucchini Banana Bread

For our last garden harvest this year, we had a large amount of zucchini. Since fall is a time of year that we love to bake in our house, I thought about combining our garden harvest with some other ingredients for a yummy but healthy snack. I immediately thought back to the delicious and nutritious coconut flour from Tropical Traditions and how great it was as a flour substitute or supplement. This recipe got the thumbs up from the whole family with an immediate request for a second batch! Always a good sign.
Mini Zucchini Banana Bread
by Lori
Wet ingredients:
1/2 cup unsalted butter softened to room temp
3/4 cup brown sugar
1 teaspoon Tahitian vanilla
3 tablespoons Greek yogurt
1 1/2 cup zucchini (grated)
1 cup bananas (about 3 very ripe)
3 eggs (medium)
Dry ingredients:
2 cups King Arthur Whole Wheat Flour
1/2 cup Tropical Traditions Coconut Flour
2 teaspoons baking powder
1 cup walnuts pieces
1/2 cup thick rolled oats
3/4 teaspoons Himalayan pink salt
2 1/2 teaspoons cinnamon
Streusel Topping:
1/4 cup walnuts pieces
4 Tablespoons melted butter
3/4 cup thick rolled oats
1/3 cup brown sugar
1 Tablespoon of flour
Mix wet ingredients:
Begin by creaming butter, sugar and vanilla to a large mixing bowl. Gently incorporate with yogurt and set aside.
In a food processor, add zucchini and pulse until finely chopped. Place processed zucchini in a cheese cloth and press to remove as much liquid as possible. Mash ripe bananas, then add processed zucchini and bananas to the large mixing bowl of yogurt, butter, sugar and vanilla. Whip three eggs - do not over beat. Gently incorporate all wet ingredients and set aside.
Mix Dry ingredients:
In a medium bowl, add wheat flour, coconut flour, baking powder, walnuts, oats, salt and cinnamon. Mix thoroughly. Then add dry ingredients to large mixing bowl of wet ingredients and gently incorporate. Do not over mix.
Liberally coat pans with butter and place mixture into them. I used 6 mini ceramic loaf pans (approximately 5 inches x 3 inches - 2 inches deep) which I bought at Michael's Crafts for a couple of dollars each (brand is Celebrate It).
Make Streusel Topping by mixing ingredients and then place this mixture on top of each loaf - cover each top completely and press down gently.
Bake 35 to 40 minutes at 350°F. Remove and let cool on a wire baking rack.
Enjoy with a cup of great coffee or a yummy latte.
37 Cooks members receive products from our sponsors to work with to create their posts; no other compensation is given. All content is solely the opinions of our members. Members also write non-sponsored posts that do not feature any products. These are not compensated in any way..
Tuesday, January 17, 2017
Savory Rye Gougeres

Bob's Red Mill makes some of the best flours out there to bake with. I love these savory little puffs that are made with Bob's Dark Rye Flour.
Savory Rye Gougeres
by Diana
Yields 24 smallish puffs
1 cup water
1 Tablespoon buttermilk powder
1/2 cup butter
1/2 cup bread flour
1/2 cup Bob's Red Mill Dark Rye Flour
5 eggs
1 teaspoon caraway seeds
1 Tablespoon dried onion flakes
1 1/2 ounces grated Asiago cheese
Preheat oven to 425°F degrees. Line a couple of baking sheets with parchment paper.
Bring the water, buttermilk powder and butter to a simmer in a medium sauce pot. Add the flours and reduce the heat to low while stirring constantly for 2-3 minutes. The mixture should form a ball. Take off the heat and let the flour mixture cool to room temperature.
Add the eggs, one at a time, beating well after each addition. Add the remaining ingredients.
Drop by the heaping tablespoon onto parchment paper lined baking sheets. Place in 425°F degree oven for 15 minutes and then reduce the oven temperature to 375°F degrees and continue baking for 7-10 minutes, until lightly puffed, cracked and golden brown. Remove from the oven and place on a cooling rack. Pierce each puff with a knife to release the steam.
Serve warm on their own or with your favorite soup, or split and fill with spinach dip, warm pastrami, Swiss cheese and mustard, roast turkey, onion and provolone cheese or whatever else tickles your fancy.
37 Cooks members receive products from our sponsors to work with to create their posts; no other compensation is given. All content is solely the opinions of our members. Members also write non-sponsored posts that do not feature any products. These are not compensated in any way..
Monday, January 16, 2017
Fried Catfish So Good You Will Wanna Slap Ya Mama
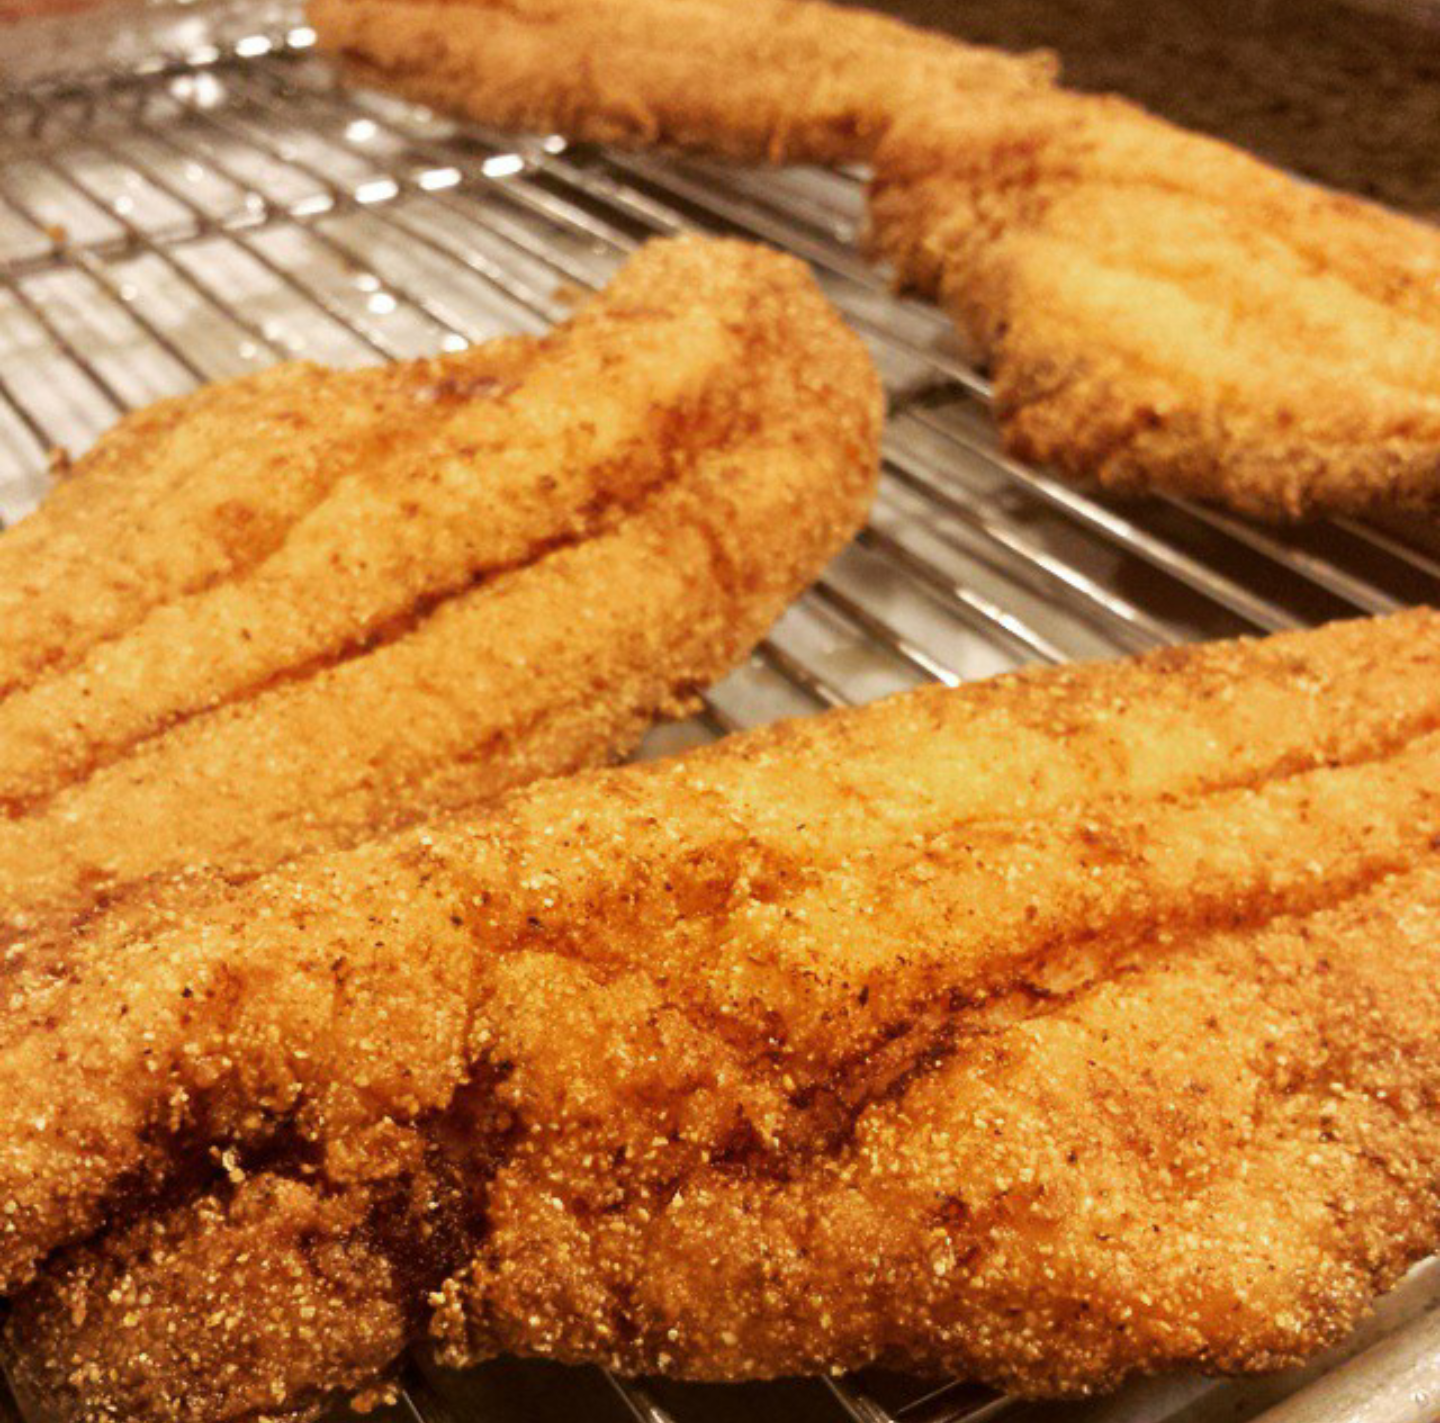
When we started 37 Cooks with 2 gallons of Slap Ya Mama seasonings I had already fallen in love with the hot seasoning and was using it for everything. For some reason I never replaced the seasoning in my fish batter but when I did, wow! It gave the fish an attitude! It can be used for other fish but Mississippi farm raised catfish is so good!
by Willie Simmons
4 large Mississippi farm raised or fresh caught catfish filets
4 large Mississippi farm raised or fresh caught catfish filets
1 quart buttermilk
2 cups all-purpose flour
1 cup corn meal (fine)
4 Tablespoons Slap Ya Mama Hot
Peanut oil
Start by putting the fish in a gallon zip-top bag or a deep baking pan with the buttermilk and soak for at least 2 hours.
Whisk the flour, corn meal and SYM together and place in a shallow dish.
Use a deep cast iron skillet. Pour in enough oil to cover the thickness of the filet. Preheat the oil to 325°F.
Drag the filets through the flour/corn meal and place on a baking rack for a 5-10 minutes.
Place 1 or 2 filets into the oil, depending on size of skillet. Fry 2-3 minutes on each side, or until crust becomes golden brown. I prefer to fry them a little longer, as I like crispier fish. We usually make more than we can eat and use the filets the next day to made unbelievable po-boy sandwiches. Enjoy!
37 Cooks members receive products from our sponsors to work with to create their posts; no other compensation is given. All content is solely the opinions of our members. Members also write non-sponsored posts that do not feature any products. These are not compensated in any way..
Subscribe to:
Posts (Atom)